
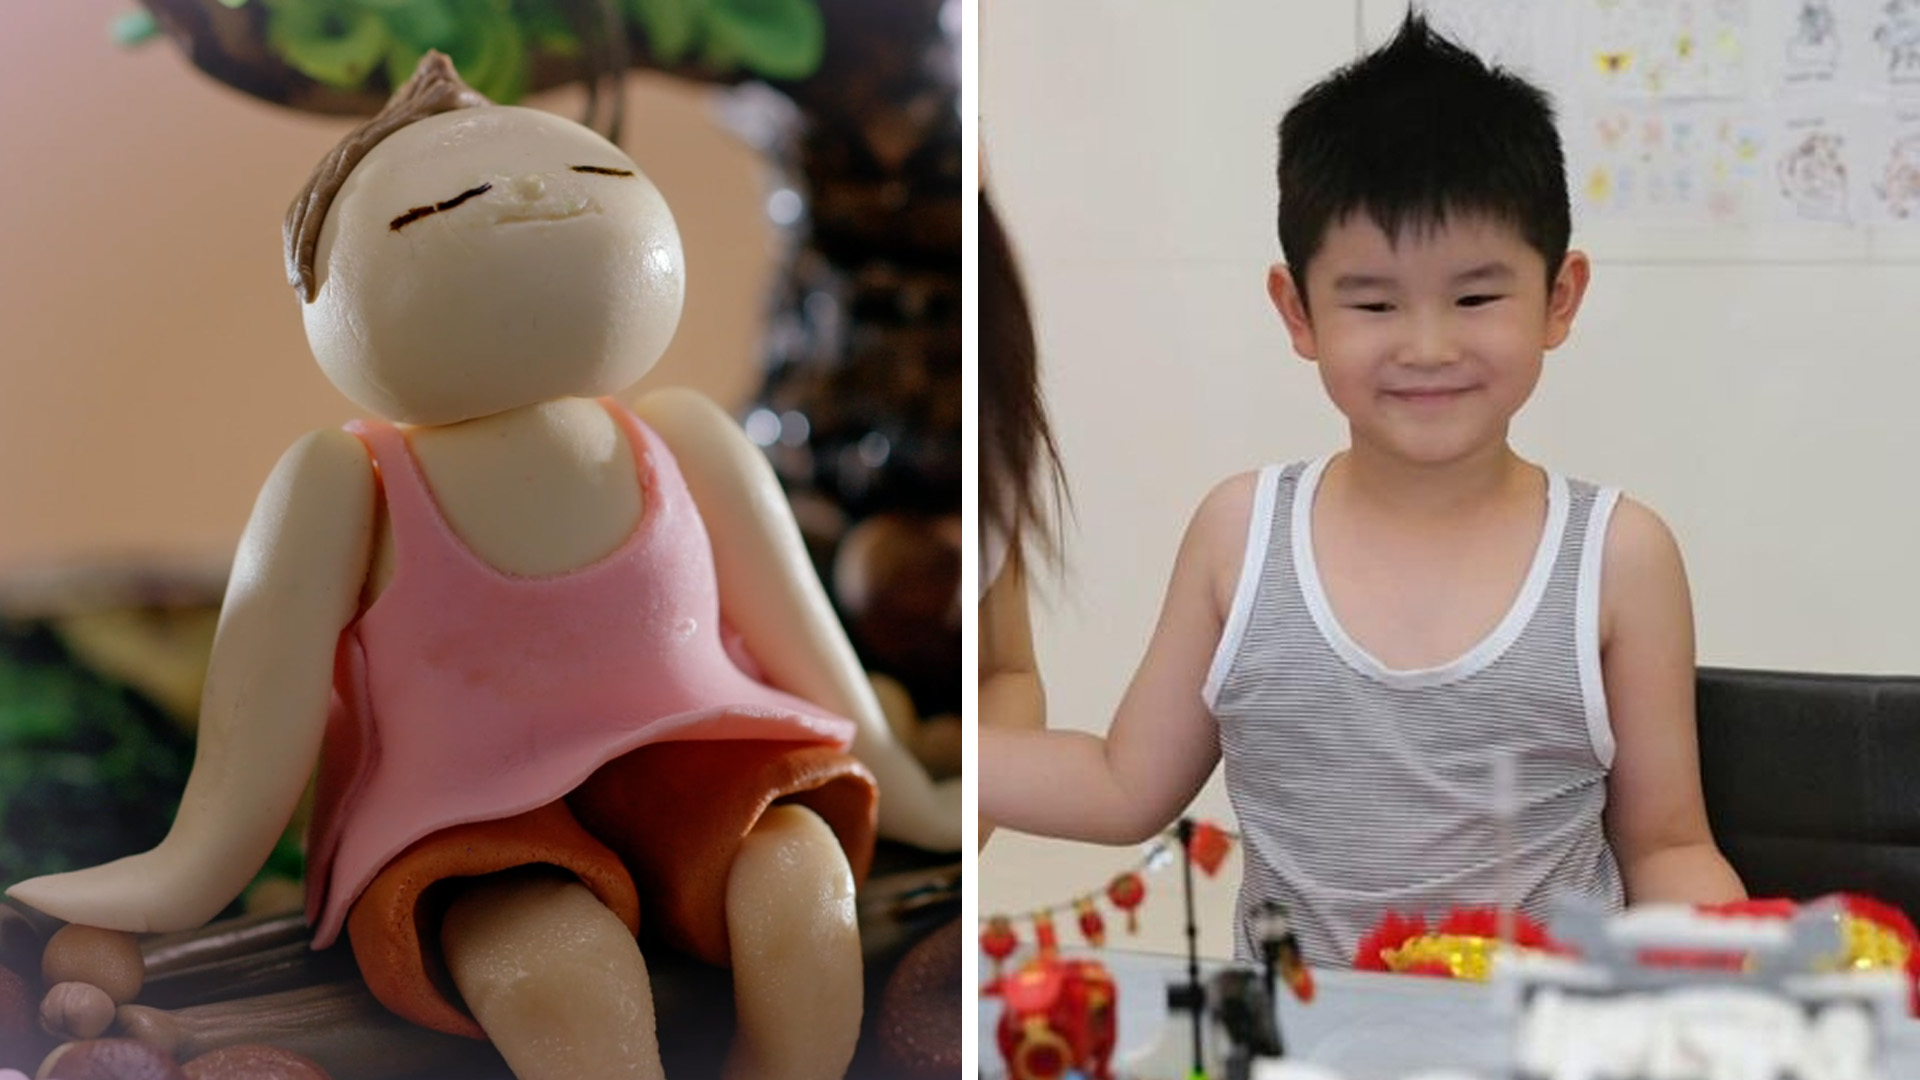
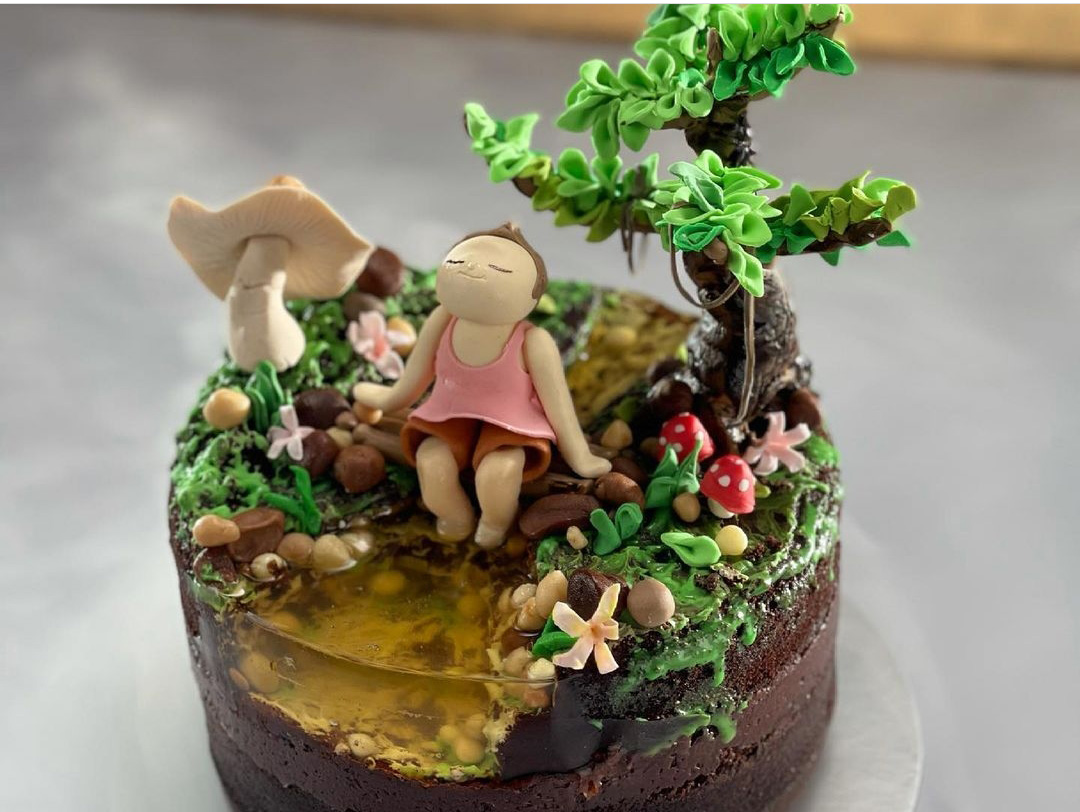
Fann Wong Makes Jelly Cake Featuring Son Zed; Hubby Christopher Lee Says It’s Actually Him
“After I made this, my husband said this is him, not Zed. He used to live in a kampong and played in the water all the time.”


The inspiration behind her unique creation, for which the recipe she shared with 8days.sg, comes from her favourite childhood treats. Her favourite dessert was the jelly her maternal grandma used to buy her from the kampong provision shop, and when she was at her paternal grandparents’ house, her fondest memory was waking up to the aroma of coffee and butter cake, her “happy food”. “Both my grandparents’ homes have very different feels, so I decided to marry the two together,” says Fann, 50.
She incorporated Zed into cake too
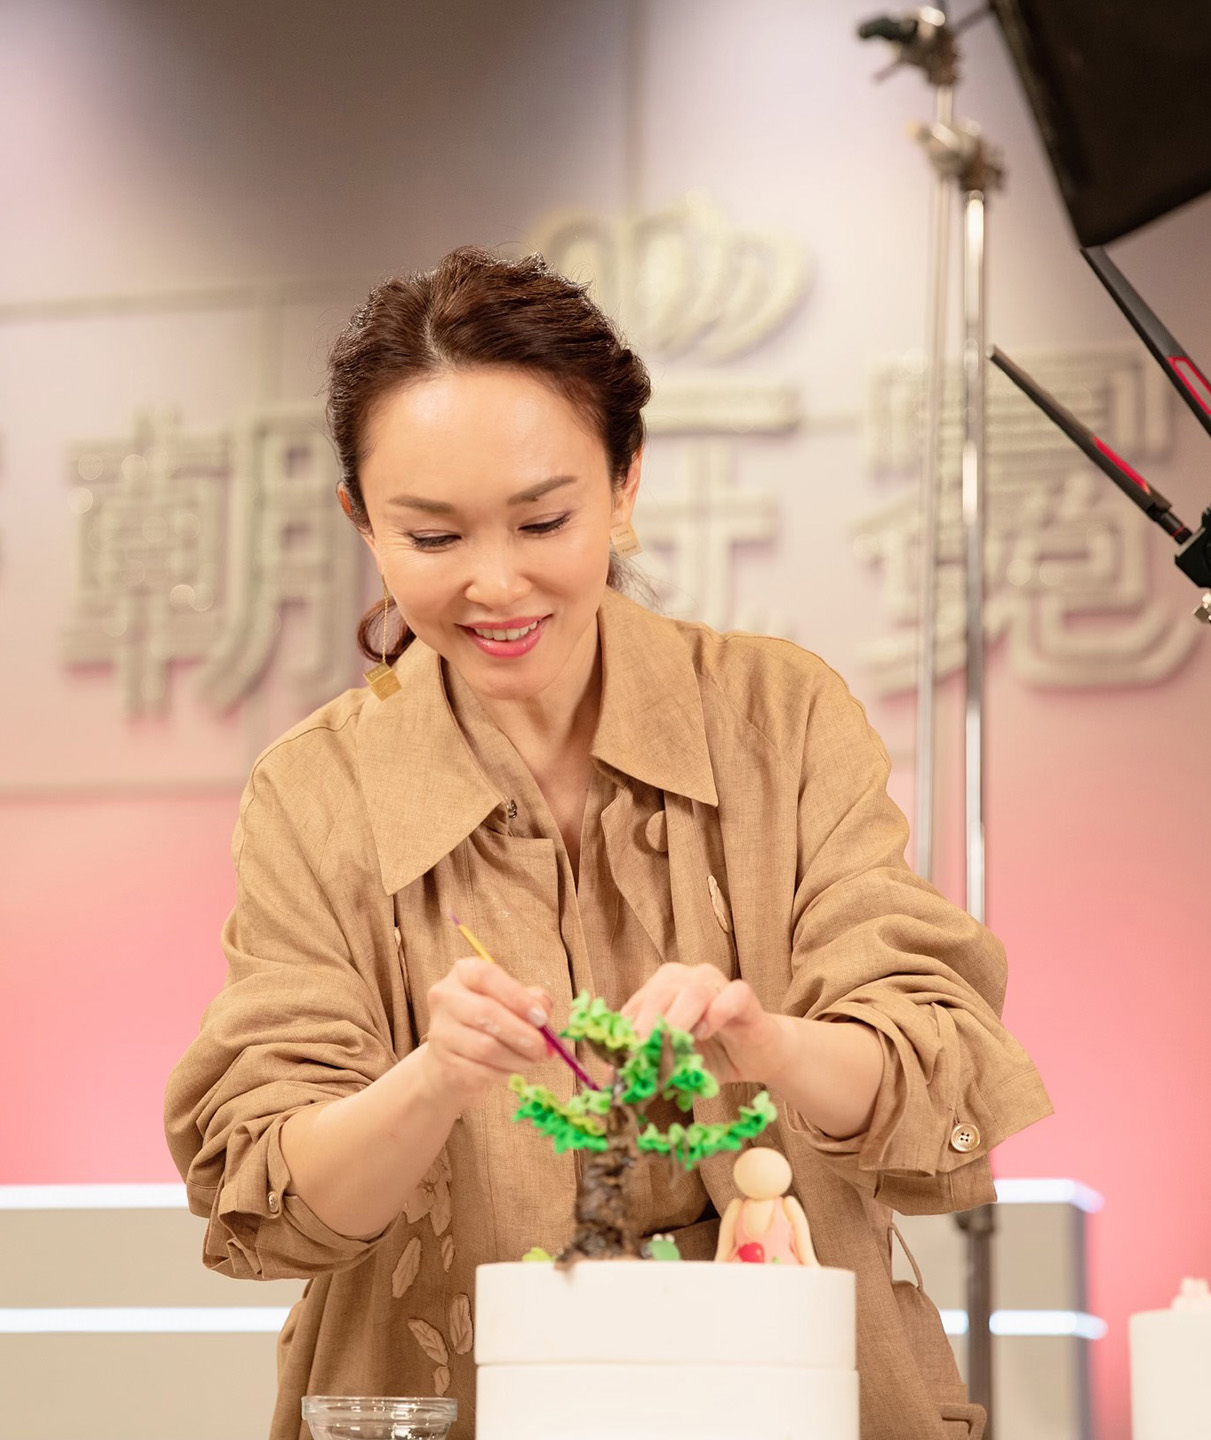
If you find the figure on the cake familiar, that’s because it’s modelled after Fann’s six-year-old son Zed. She even got his little mohawk down pat.
“I added Zed to the cake because I wanted this to be part of his childhood memories [in future] too. I want him to remember that mummy made this cake for him,” explains Fann.
“Zed loves nature. He likes botany, playing with ants and water, so I made a tree, plants, mushrooms, and a stream. He was very interested in the cake when he saw the stream and wanted fishes inside, but it’s too complicated,” she laughs.
“After I made this, my husband [actor Christopher Lee] said this is him, not Zed. He used to live in a kampong and played in the water all the time. Actually, I didn’t even think of him when I made this. Sorry.”

“It’s like playing with Play-Doh”
But what you’ll be surprised to know is that Fann has never learned cake decorating prior to creating this masterpiece. She only had a half-day crash course with a baker friend to pick up some tips and techniques. The most challenging part, she says, is making the figurine because you not only have to get the facial expression of the cake topper figure right, but also details like the size and the way it sits.
“For it to look realistic, you need to tilt its head at the correct angle, and the face and limbs are not easy to shape too. I made around 10 figurines and the first few were very different from this one. You need a lot of practice to get the hang of it. But the rest like the fondant leaves, pebbles and mushrooms are very easy to shape. Just use your imagination and create things that you like. It’s like playing with Play-Doh!” she says.
“My husband was quite impressed. He said ‘Wow, the singlet can fly [in the wind]. Very nice.’”
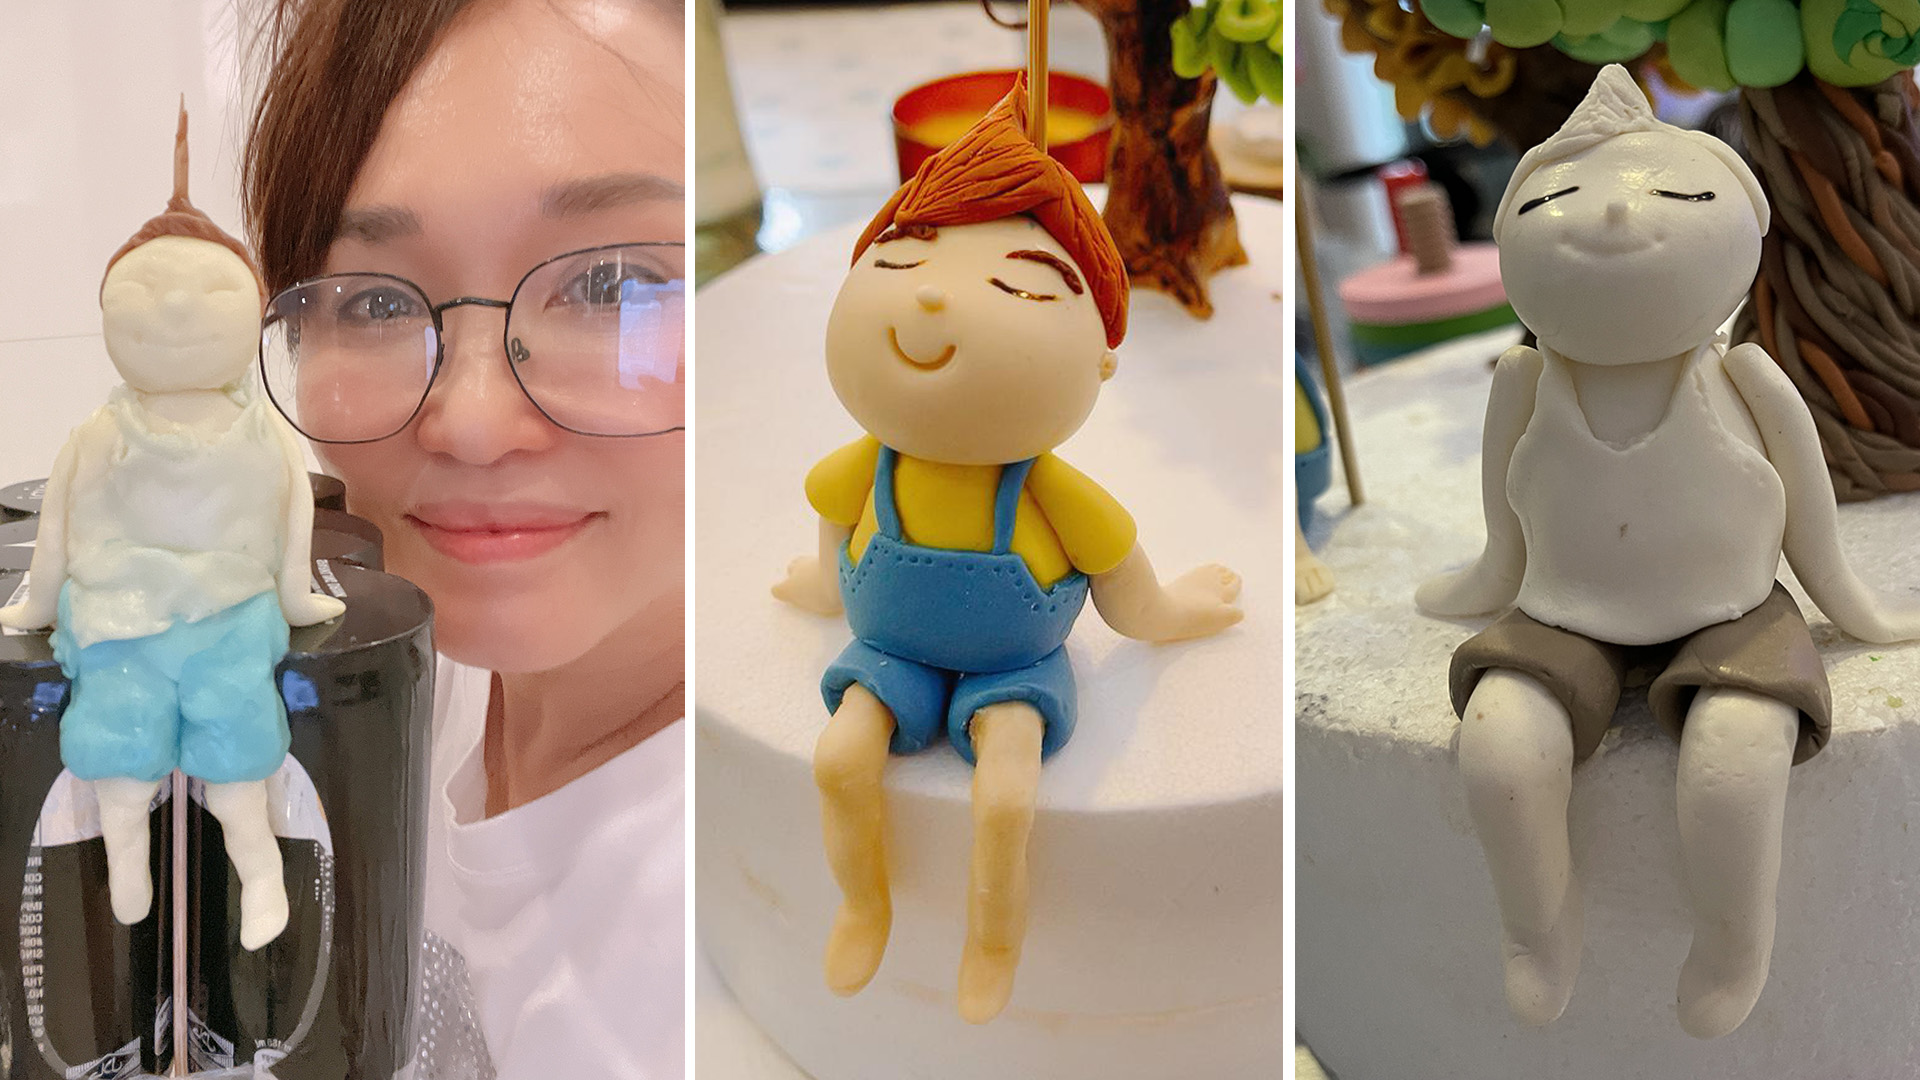
The first few versions of "Zed"
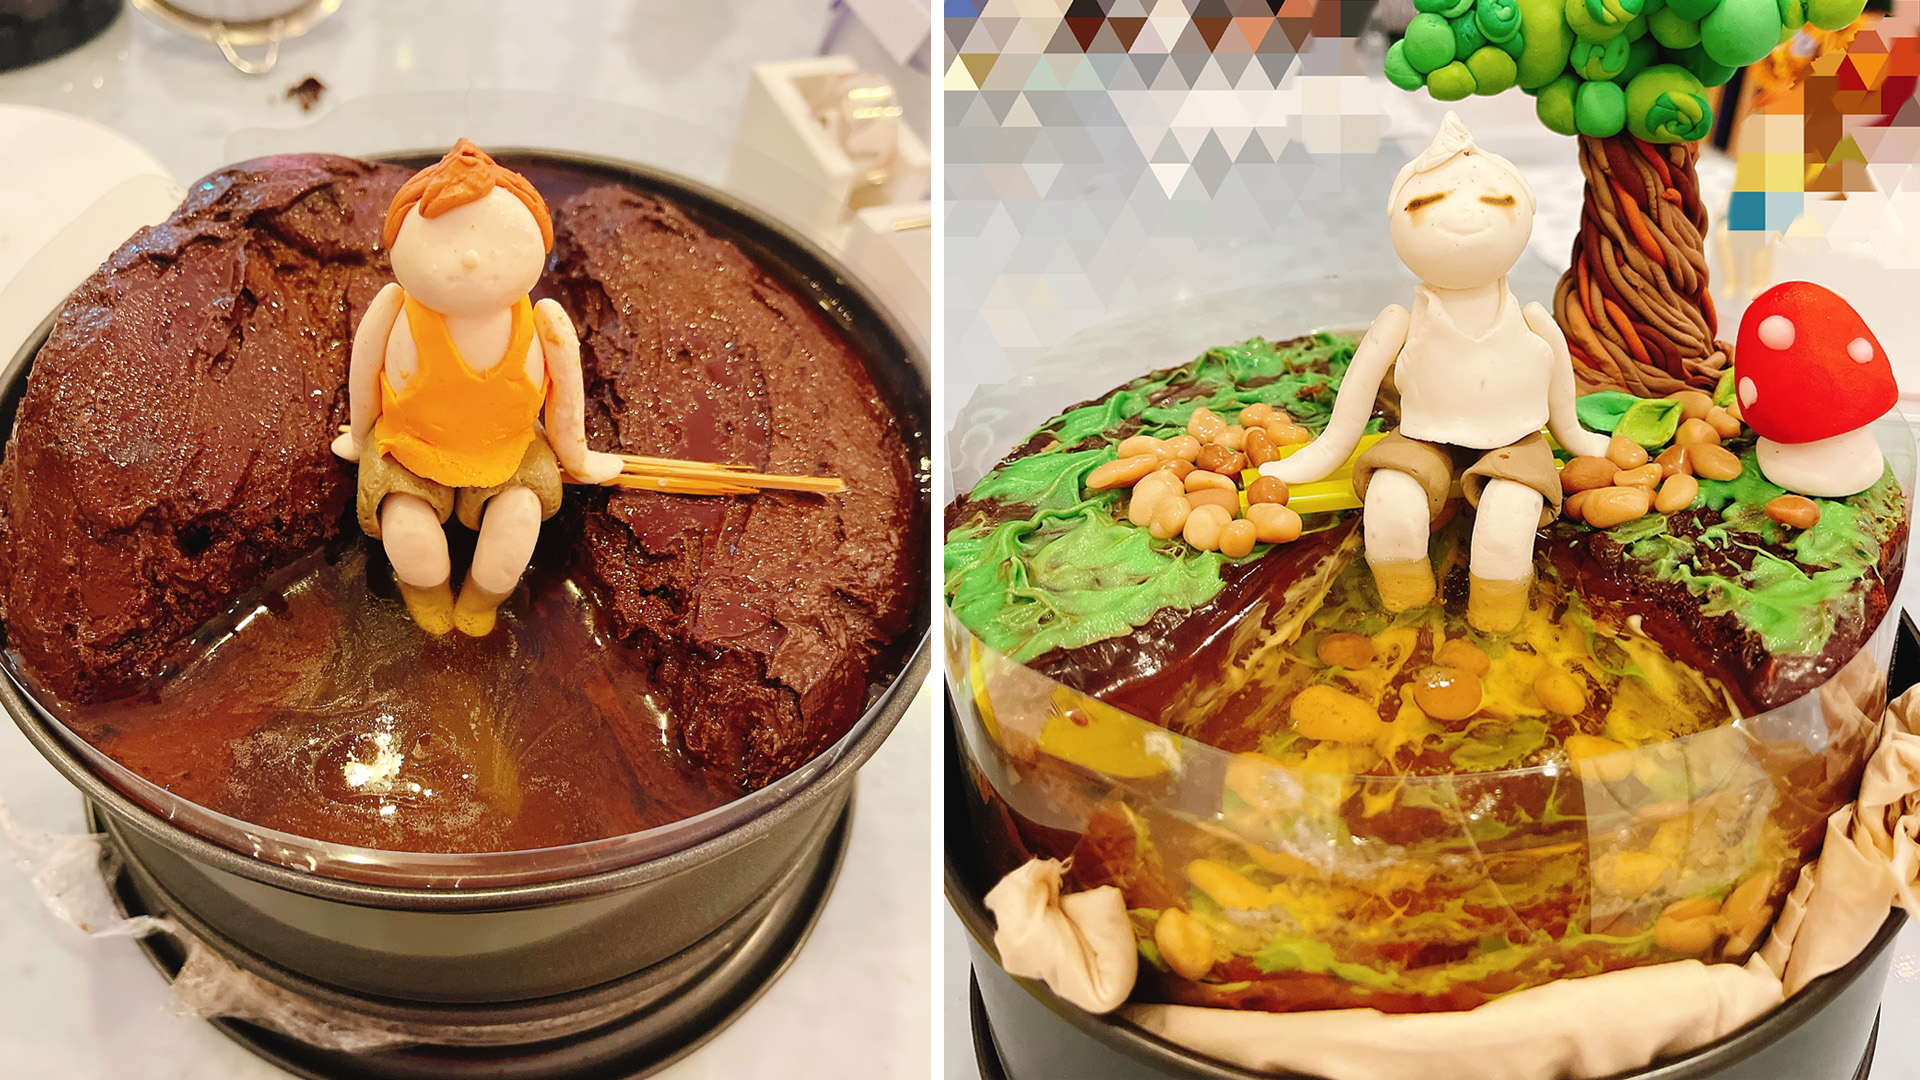
Creating the gelatin “stream” also involved quite a bit of trial and error too. As the gelatin would seep into the cake when she poured it in, the family went through several cakes before she figured out how to best combine the two.
There was a lot of trial and error, says Fann. “In order to cut costs, there were days where I made the cake base using cake mix instead of from scratch. My helper ate a lot of chocolate cake in the process.”
So does she prefer baking or cake decorating?
Fann hesitated before replying: “I love both, but bakes are very important. It doesn’t matter how well you decorate your cake if it doesn’t taste good ‘cos you will remember the taste most.”
“I enjoy decorating too ’cos I like to do arts and crafts,” she continues. “I told my husband that when Zed goes overseas to study when he is older, I will join him and learn baking. This dream is a luxury for me, but I hope I can fulfill it in future.”
FANN WONG’S CHILDHOOD MEMORIES CHOCOLATE JELLY CAKE RECIPE
For chocolate cake base
Makes a 9-inch chocolate cake
Ingredients:
340g caster sugar
63g unsweetened cocoa powder
1 tsp salt
1½ tsp baking powder
1½ tsp baking soda
310g all-purpose flour or cake flour
120ml vegetable oil
2 large eggs
235ml boiling water
235ml milk
1 tsp lemon juice
1 tsp vanilla extract
Method:
1. Preheat oven to 175°C. Lightly grease and line 9-inch cake pan.
2. Whisk cocoa powder, caster sugar, salt, baking powder, baking soda, and flour in a large bowl until smooth. Set aside.
3. Whisk vegetable oil, eggs, milk, lemon juice and vanilla extract with a handheld mixer in a large measuring cup or bowl until smooth. Reduce speed and carefully add boiling water into the cake batter until well combined.
4. Add cocoa mixture from step 2 and whisk until smooth. Batter will be thin.
5. Pour into the prepared pan and tap tin on the table to burst any air bubbles. Bake until toothpick inserted in the middle of the cake comes out clean, around 28 to 35 minutes.
6. Remove cake from oven onto a rack and let it cool for around 10 minutes. Run a thin knife around the edge of the pan to unmould the cake and transfer to the rack to cool completely before covering and chilling in the refrigerator. The cake can be prepared one day earlier.
For the chocolate buttercream
Ingredients:
85g unsweetened cocoa powder
565g powdered sugar
225g unsalted butter, melted
1 tsp vanilla extract
1/2 tsp salt
5 tbsp milk (around 74ml)
Method:
1. Add cocoa powder and powdered sugar to a large bowl. Whisk to combine and remove any lumps.
2. Add unsalted butter and mix with an electric mixer until crumbly, then add vanilla extract.
3. Add milk one tablespoon at a time until it reaches the consistency that you want. If the frosting is too wet, it will not hold its form. Add more confectioner’s sugar, one tablespoon at a time, until it reaches the right consistency. Use immediately.
For chocolate ganache
Ingredients:
120g heavy cream
223g semi-sweet chocolate chips
Method:
1. Heat cream in a saucepan over medium heat until it begins to gently summer. Do not let it boil.
2. Remove from heat then pour over chocolate chips. Stir occasionally until completely combined and chocolate has melted. Ganache should be of spreading consistency.
For white chocolate
Ingredients:
80g white chocolate, chips or chopped into small pieces
Green and yellow colouring for decoration
Method:
1. Place white chocolate in a heatproof bowl and microwave for 10 seconds at a time, stirring after each set. Once chocolate is almost melted with just a few lumps, stop and stir until it is completely smooth.
3. Divide chocolate into two bowls and add respective green and yellow colouring as you desire.
For gelatin jelly
Ingredients:
¾ cup cold water
60g gelatin powder
75g sugar
300ml water
2 tbsp lemon juice
Method:
1. Place cold water in a small bowl and add gelatin powder while whisking with a fork. Set aside for 10 minutes.
2. Add sugar and water in a saucepan and bring to a boil. Remove from stove and add to gelatin mix. Add lemon juice, stir until combined.
3. Let it cool and thicken.
Decorations:
Ingredients:
Modelling chocolate. It is not as easily available in Singapore but you can still buy it online from Amazon.
Gum paste
Acetate sheet
2 wires to create tree
Cake colouring as you desire (in green and brown for the tree, pink and red for the flora and figurine)
Required tools:
9-inch springform pan
Cake turntable
Cake leveller
Angled spatula
Scraper
Method:
1. Create an even surface by levelling the top of the cake. Use your hand to lightly press down the top of the cake and slice off any dome with a sharp serrated knife.
2. Use the same method to slice chocolate cake into two even layers.
3. Using only the circular plate-like base (without its sides attached) of the springform pan, apply a bit of buttercream onto the centre. Place cake in the centre of the pan's base till it 'sticks' to the buttercream. Place cake onto turntable.
4. Place bottom layer of the cake in centre of the pan and add buttercream to the centre of the layer and spreading using an angled spatula. Stack second cake layer on top.
5. Use a cake knife to carve out the “stream” on the top cake layer, creating a “step” such that the bottom of the “stream” is deeper. Don’t worry if the step is too sharp, you will be covering it up with pebbles and weeds to make it look more realistic. Set aside the excess cake that you carved out.
6. Apply a thin layer of chocolate ganache to the inside and top of the “stream”, making sure to fill any cracks or holes. This acts as a seal to prevent the gelatin from seeping into the cake when we pour it in later. Refrigerate for 20 to 25 minutes so the ganache will solidify.
7. Spread a layer of yellow-dyed white chocolate mixture you prepared earlier. This will act as an additional seal against the gelatin, as well as to brighten up the stream bed.
8. Use modelling chocolate to create pebbles, mushrooms, and other decorations for the gelatin stream. Roll into shapes and colour them as desired.
9. Cut three satay sticks of equal length and wrap with brown gum paste to create the bridge where “Zed” sits.
10. Paint with brown gel colour.
11. Use chocolate ganache to stick the bridge down and touch up with brown colour gel.
12. Make the tree with modelling chocolate. Shape the trunk and insert two wires as branches. Wrap wires with modelling chocolate.
13. Paint the tree with colouring.
14. Make leaves out of fondant. Cut fondant into little hearts, then pinch the wide portion together to create a leaf. Paint with colouring.
15. Add leaves onto the tree using a bit of chocolate ganache as ‘glue’.
16. Touch up the tree with more colours.
17. Prepare gelatin mixture.
18. Cover the sides of the cake with the acetate sheet. Make sure the top is higher than the cake so the gelatin will not flow over when you pour it in. Tape it tightly.
19. Attach the sides of the springform pan around the layered cake.
20. Add gelatin to the carved-out area of the cake little by little. Pour at the deepest area first, then let it set for around five minutes before adding more. This way, you can make sure the gelatin doesn’t seep into the cake. Remove any bubbles as you go along with a spoon. Keep going until all the gelatin is added. Allow it to set.
21. Work on the figurine.
22. Touch up cake with more decorations.
23. Add final touches to the cake before removing the springform ring and acetate sheet.
24. Using a spatula, spread a thin layer of chocolate ganache to the side of the cake to complete your masterpiece. Chill in the fridge for at least two hours to set.
Photos: Fann Wong, Creme De La Creme

Related Stories


Shopping